Before I begin, I would just like to commend all plumbers as being some of the most mature professionals going. It was not until I found myself asking a veteran plumber about the size of my nipples and whether or not my ballcock was leaking that I realized how needlessly paranoid and darn near prudish I was in my attempt at plumber parlance during my endless quest to FIX my constantly running 1928 American Standard “Monaco” Toilet.
Now, I am a pretty adventurous DIY’er. I grew up shadowing my father completing tons of different projects. I enjoy it. What I don’t know, I research and I’m not afraid to fail, or learn by doing. Electrical work was my last big project, and I am happy to report that I am still alive. This toilet situation, however, has made me contemplate giving myself a swirly to end all swirlies — just to clear my head, to make me come to my senses, to bring me to an understanding — some kind of understanding of how to approach this problem which MUST be easier than I’ve been making it.
Here it goes…
“Daddy, why does the toilet keep making noise?”
It was a fair question, so I told my two kids that it involved a flapper, a seal, or an adjustment on a chain. It needed more…
“You’re probably paying hundreds if not more money for that running toilet.”
The woman at the Town Water Department looked at our bill for 17 days–a bill that the previous owners left us with…but for 17 days of limbo, that toilet ran up fifty some dollars in water. Remember…no one is in the house, no one using the water…just $52.73 for trying to keep that tank filled. I find it honorable for a toilet to want to present itself when we moved in with a full tank of cold water, but, it was a costly gesture, and one that needed fixing.
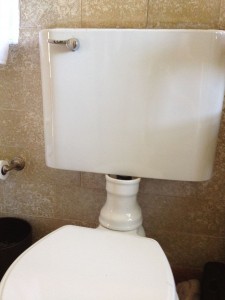 So, I open up the tank…take a look inside and venture off to Home Depot. Once there, I get a new Flush Valve set and come back home.
When I remove the “stem” (from Tank to Seat) I notice that it’s not very healthy…and that it’s flaking and falling apart…
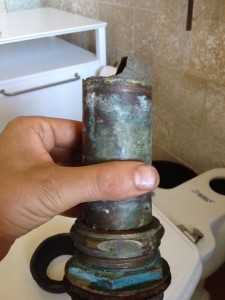 So, I went back to Home Depot looking for the 7 inch, 2 inch wide (which flares to 2 5/8ths) piece of pipe…not realizing that the “flare” part of it is about 2″ and I needed a straight piece of about 5″.
“No, you don’t need to do that…just use the good part of the pipe and then add some PVC and a Fernco clamp.”
That’s what the Home Depot guy said. So, I bought the PVC, the Fernco, got home, measured, cut, sanded, clamped and then realized that the fancy porcelain cover (that covers the “neck”) can’t take the thicker PVC Pipe. I contemplated shaving the porcelain to MAKE it fit, but then thought better. Problem is, no one makes the copper or brass 2″ section I needed…at least at True Value, Home Depot, Lowes, etc…Off I went to a big Supply House in Westchester. I bring all the pieces of my project…
“Oh. The guy back there will help you.”
I went deep into the offices of this Supply House…sat at a desk with a man eating a Tuna on rye and proceeded to take out all this piping that’s been in this toilet for close to a hundred years. Bon Apetite.
“THEY couldn’t help you up there, for this? Hang on…”
Rubble rubble, grumble grumble, and he’s back holding a 2 inch J section piece of pipe.
“You good with a hacksaw?”
I got home and cut the 5″ straight that I needed…thank goodness that piece yielded a 5″ piece. Now, to assemble…
(I’m choosing to skip over all the different gaskets and spud nuts and all that crap in order to speed to where I am now: LEAKAGE! FRUSTRATION! DESPAIR.)
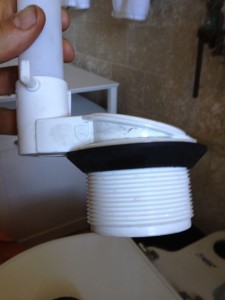
Problem is, I can’t get a good seal from the Shunt Seal going from Flush Valve base to the gasket tied in with the plastic “acorn nut?”…
I followed the directions on the Flush Valve kit, and then put another gasket on the bottom (the one they included, only, THIS one was too fat and used for bottom mounting tanks…ones that smash these rings into pancakes…but, my toilet has side brackets on the back so I don’t have that luxury…)
 I can’t use this gasket…I tried, can’t get enough thread on the bottom of the flush valve…so, I used a simple gasket and tightened the hell out of it.
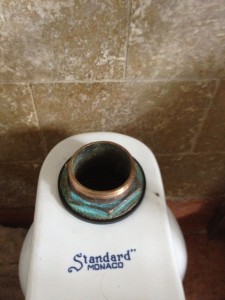
My next step was to make sure there was a good tight seal between my new run of pipe and the toilet base…
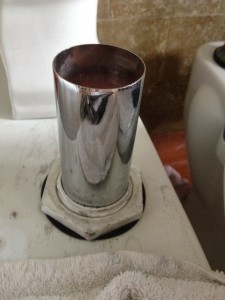
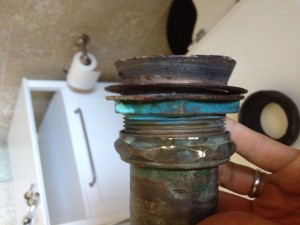 The flare is what goes into the toilet seat base and then, I was assuming it locks down by tightening up the the nut…”Spud nut?” and smashing a shunt gasket so it’s tight.
What am I left with?
The collar on the base with seal, with the new pipe and then the tank with the new valve and the seal…all I need to do is to put that heavy tank on the new pipe and then, when I make sure it’s all dry, put that pretty porcelain piece over the neck.
After trying to tighten, to re-gasket, to even FERNCO the attachment…LEAKS, LEAKS, and MORE LEAKS.
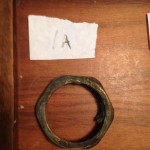
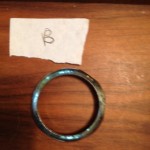
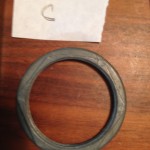
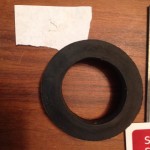
What am I doing wrong? Below are assorted washers, nuts and gaskets that I’ve removed…I put letters next to each for reference…could someone tell me the order in which I am supposed to put these on?
I asked a plumber who is currently 
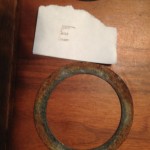 switching out our MASSIVE boiler and he took a peek and said…
“All you need is a 2″ nipple, a douglass nut, a spud nut and you’re good.”
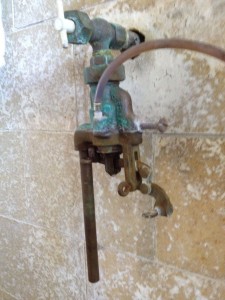
I smiled. He left. I knew in my heart, I was not good. He also looked at the “rotary curtain flush valve” and added…
“Those you can buy a who new unit…you should.”
I can’t find these damn things anywhere…and when I do…they are almost $200!!!
Not sure why I’m making this much harder than it should be. Am I? Is anyone out there that can point me in the right direction?
“How much does a new toilet cost?”
My wife is a bit sick of my wrestling with this thing and being down one toilet for the house. Not to mention I am not the most pleasant to be around either socially or olfactory as I struggle to get this right. Not quite ready to throw in the pipe wrench, wanted to send off my Toilet Flare to anyone who had some ideas.
I am VERY appreciative.
Thanks…
A.L.N.

